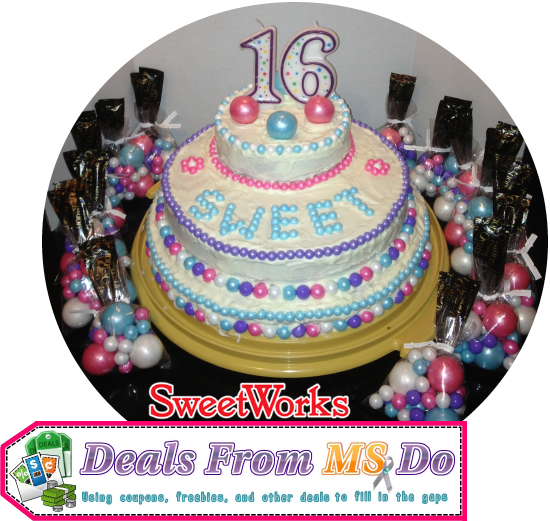
Sweet Sixteen Birthday Cake Tutorial
Ingredients
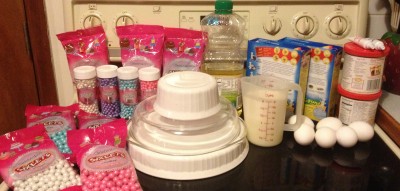
- 2 Funfetti Cake Mixes
- Eggs (x2 mixes)
- Milk (instead of water x2 mixes)
- Cooking Oil (x2 mixes)
- Nonstick Cooking Spray
- 2 Cream Cheese Frosting
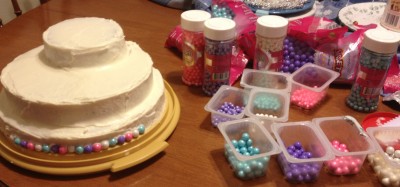
- SweetWorks Celebration Candy Collection
- Mixer
- 3 Oven-Safe Bowls or Pans
- 3 Wire Racks
- Cake Leveler
- Cake Platter or Storage Container
- Cake Tester (optional)
- Angled/Bent Spatula
- Toothpicks (optional)
Instructions
- Preheat oven to temperature recommended on cake mix box.
- Gather all ingredients and materials before beginning.
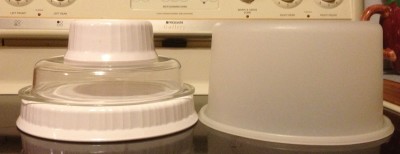
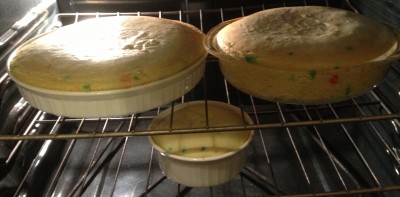
- Stack cooking bowls on top of one another and compare to the height of the cake platter lid. This ensures the cake will fit under the cover when cooked.
- Mix the cake batter according to the directions on the package, except use milk instead of the water. The milk makes the cake more moist than the water. Fresh cooking oil also improves the overall flavor.
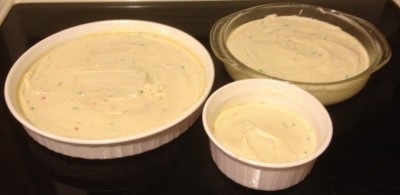
- Spray each of the oven-safe bowls or pans with nonstick cooking spray. Leave about ⅓ of each bowl or pan empty to allow the cake plenty of room to rise.
- Bake according to the box directions, the type of bowl or pan you are cooking in, and your stove. The back of my stove cooks more quickly than the front of my stove. My cakes are pulled to the front of my stove to allow for more even baking.
- Using different types of bowls, pans, silicone or cookware, will require different bake times for each cake. Use the box directions as general guidelines, but the individual cakes can be tested using a clean, cake tester, dry fork, or butter knife. Insert the utensil of choice into the center of the cake. If the utensil comes out clean, the cake is completely cooked. If the utensil comes out sticky, gooey, or otherwise covered with cake, the cake needs to cook longer. Rinse the utensil you are using, dry, and repeat testing until the cakes are all completely cooked.
- Remove each cake from the oven as needed. The smaller the pan, the quicker the cake will cook.
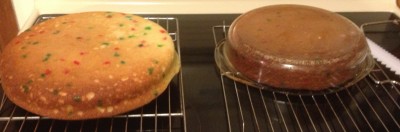
- Allow the cake to cool for a few minutes after removing from the oven.
- Place a wire rack on top of the cake pan, carefully and quickly flip the cake pan over. The cake will release without tearing, if enough nonstick spray was used. Flip all three cakes onto wire racks to cool.
- After the cakes are cool (or mostly cool), the rounded tops can be sliced off using the cake leveler. Place the cake on a level surface, rounded side up. Stand the cake leveler up against the edge of the cake and gently work the leveler through to level the cake. Do not hold the leveler at an angle or the cake will have hills and valleys cut through it.
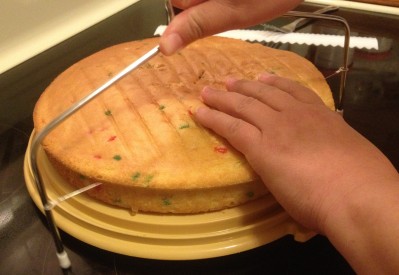
- Set the rounded cake top aside and snack on it to avoid cutting into the cake. ;)
- The cake leveler, when held correctly, will help you create layered cakes that are level on the top and the bottom.
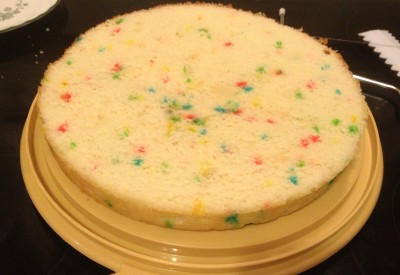
- Set the leveled layer aside, on a wire rack, to finish cooling.
- Level the middle and top layers of the cake.
- Use the wire racks to flip the cake layers back and forth.
- Transfer the bottom layer of the cake onto the serving platter, centering the cake on the platter. The cut side of the cake needs to face down.
- Brush away all loose crumbs as you see them. This will keep them from becoming trapped in the frosting.
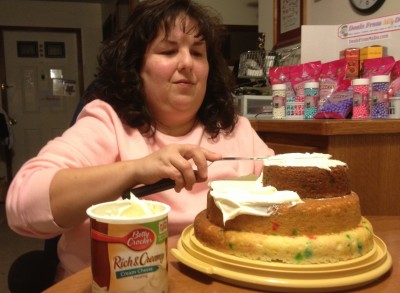
- Spread a few tablespoons of frosting across the center of the cake. The frosting will anchor the next layer of the cake onto this layer, keeping it from slipping and sliding. A plain butter knife will work to spread the frosting, but I have used an angled spatula for years. I prefer the lightweight feel as I frost my cakes.

- Flip the middle layer onto the cake and position, center, back edge, etc. Again, the cut edge is facing down.
- Determine where you want the smallest layer placed, mine was on the back edge. Add frosting to the uppermost layer and put the smallest cake layer in place.
- Don't stress your body needlessly, sit down if it's more comfortable for you. Really, this picture is to show the shapes of the different layers and the positions of each of them.
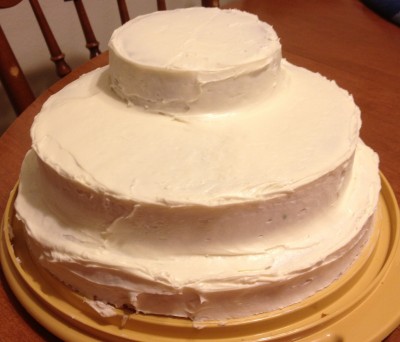
- The icing does NOT go on nice and pretty to begin with. Think of it as a clay project that you need to work.
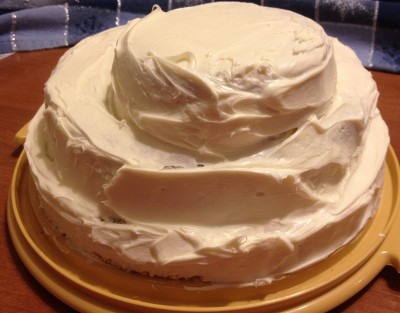
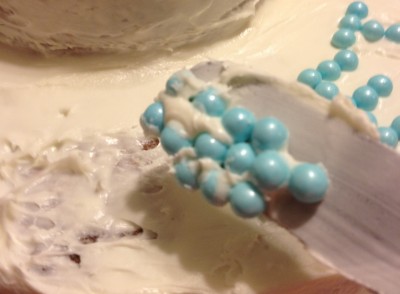
- Experiment with tools for different textures in the icing. This was an icing ruler that was $1.25. I wasn't happy with the results. Cake frosting out of a can is NOT what you need to use for these fun tools. Buttercream frosting is a better option.
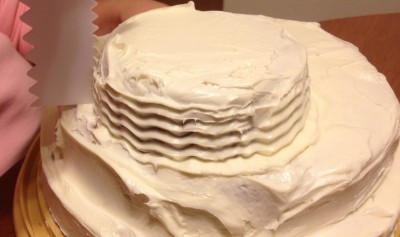
- Don't like the way the frosting looks on the cake? Give it a few minutes to "dry" and "set." This will allow the frosting to be worked into a smoother finish. It doesn't have to be perfectly smooth, the candy decorations will cover up most imperfections. Someone that saw my finished cake actually asked me if I used fondant!
- Pour some of each of the Sixlets into their own individual containers. Line them up in the order/pattern you intend to place them on the cake. Using the small containers helps speed placement of the Sixlets and keeps the Sixlets in the correct order for the pattern.
- Turn the cake so that you are facing the back of the cake. Placing the Sixlets around the bottom edge of the cake in the desired pattern. By starting the pattern in the back, it allows the pattern to flow smoothly around the front of the cake and any Sixlets that don't fit the pattern will be hidden on the back side of the cake.
- Is a Sixlet too big to fit into the last space? Use one of the smaller Celebration beads to fill in the gap. I did! Let me know if you find the smaller bead I tucked in. Until you saw this enlarged photo, I bet you didn't realize just how crooked my candies were, did you?
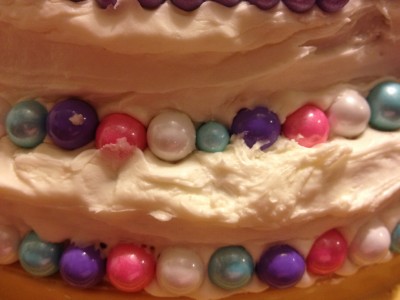
- Place another row of the Sixlets around the edge of the middle cake layer.
- Use the smaller blue Celebration Candy Pearls to form the letters SWEET. The middle E should align to the center front of the cake. Make a mistake? Don't stress! Use the a spatula or knife or toothpicks to remove the letters that don't align the way you wish for them to. Toothpicks can also be used to gently slide a letter up, down, or to the side. The toothpicks can be used to draw the word in the icing before creating the letters.
- Create flowers using the colors not already used on the SWEET layer, to fill in the spaces. A white Candy Celebration Pearl in the middle was surrounded by pink Candy Celebration Pearls to form the flower.
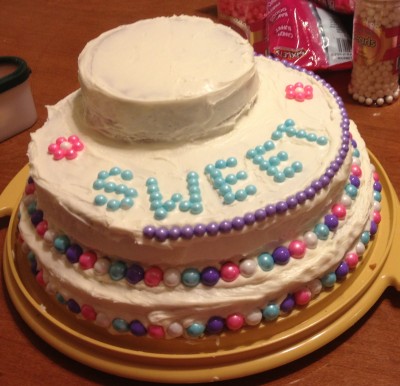
- The purple Celebration Pearls were used to create a ring around the top of the middle layer of the cake.
- The pink Celebration Pearls were used to create a ring around the bottom of the top layer of the cake.
- The blue and white Celebration Candy Pearls were used to create a ring around the top of the uppermost layer of the cake.
- The top layer also had the jaw breaker sized Celebration Gumballs added for extra flair and to help support the candles.
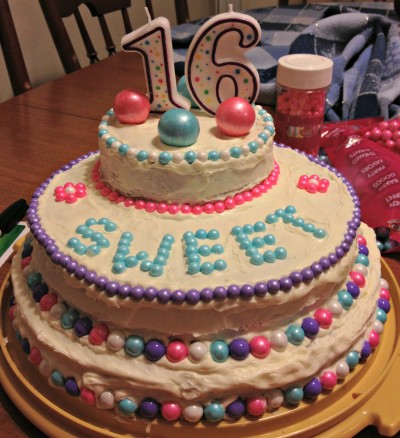
- Toothpicks were also used to hold the candles upright. Do not place candles on cake until needed, they still tend to fall over.
Recipe by DealsFromMsDo.com at https://dealsfrommsdo.com/sweet-sixteen-birthday-cake-tutorial/