When I bought my Silhouette machine, I bought it used from a friend. She suggested I use the sticky type plastic wrap for transferring my creations from the mat. It wasn’t long until outgrew the plastic wrap and needed something more stable. Thankfully, I began reviewing products for Angel Crafts and a roll of Transfer Paper Tape was next on my list.
I have to say that the Transfer Paper Tape does make my life so much easier, especially when making vinyl projects. It keeps the vinyl from stretching, as it could when I used the plastic wrap.
Using Transfer Paper Tape
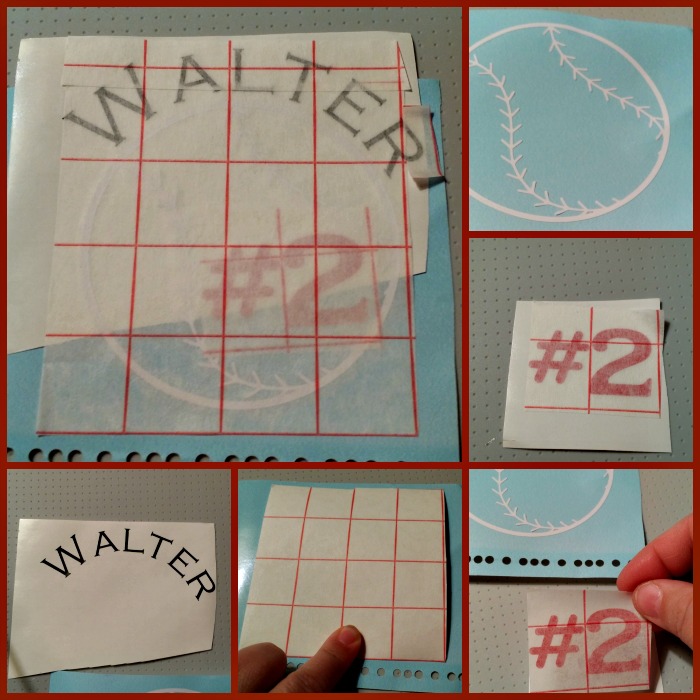
With Premium Transfer Paper Tape in hand, I braved up, and created a layered vinyl project. I had three separate layers to begin with. A baseball, #2, and the name Walter. After weeding the excess vinyl, I needed to add the #2 to the baseball. I cut a small section of the Transfer Paper Tape and smoothed it over the #2. It picked up the #2 just like a tight magnet. I positioned it over the section of the baseball that I wanted it and placed it. I made NO attempt to remove the Transfer Paper Tape from the #2 once I placed it on the baseball. It really won’t let you. 😉
 Black Matte Vinyl
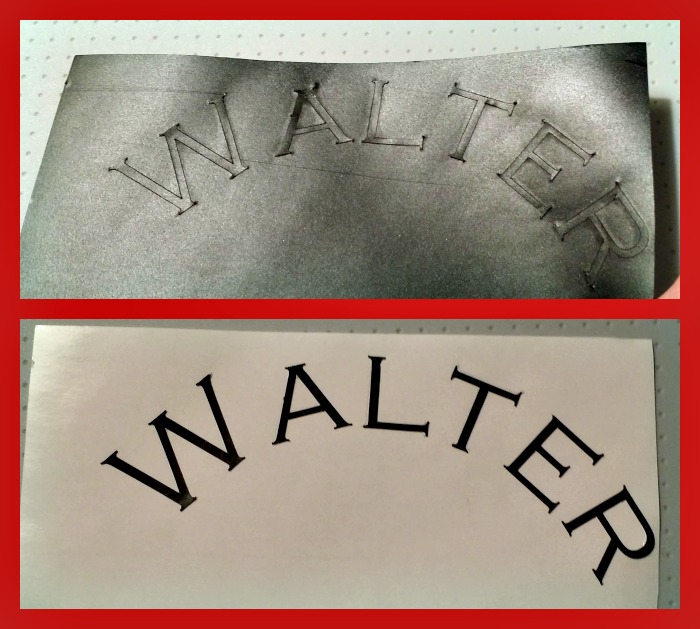
The Black Matte Vinyl is another one of the great Angel Craft products that I’ve been able to review. Like the White Vinyl I previously reviewed, I was thrilled to see that I had received another roll of Oracal Vinyl. This is an excellent quality product, which always delivers a fantastic result. As you can see, it is a true matte finish, even under direct light.
I next cut a 4″ x 4″ square of the Transfer Paper Tape to position over the entire baseball. With the square grid, I didn’t have to measure anything. Each red square is a square inch, easy peasy works best for me! This also made it easy to lift the baseball away from the blue backing it was on, to slide the Walter name underneath it. After it was positioned like I wanted it, I then placed a strip of the Transfer Paper Tape across the front of Walter’s name and a small piece on the back to secure it all together.
When you’re ready to place the project, just remove the regular vinyl backing, position the project as desired, and press it into place. After it’s firmly adhered, then gently lift up the Transfer Paper Tape, piece by piece, again I apply pressure to the vinyl pieces as I remove the tape.
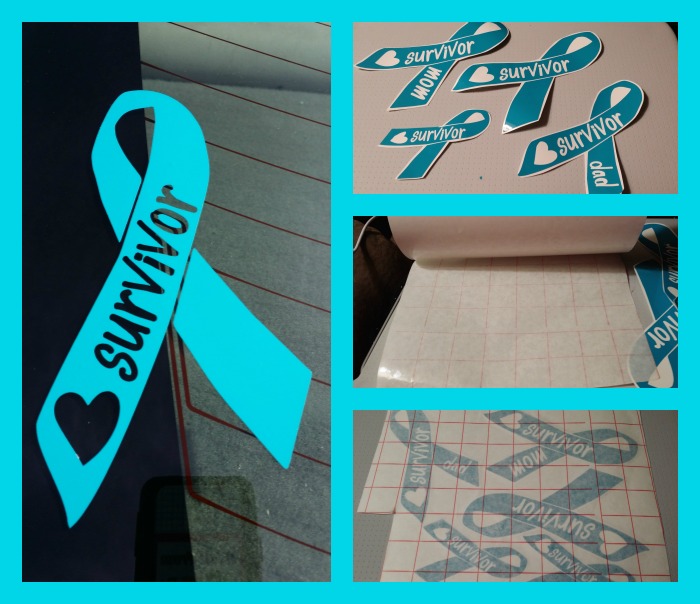
While the Silhouette machine was busy cranking out the projects, I also cut some Support Ribbons for Sexual Assault Awareness Month. Instead of cutting the Transfer Paper Tape to size for each ribbon, I lifted up the backing and placed several ribbons on the sticky side of the Transfer Paper Tape, then placed the backing over it. I lifted up the other side, placed more ribbons, then placed the backing down again. This method worked, but I found it was easy to get wrinkles in my vinyl.
The adhesive on the Transfer Paper Tape is extremely strong. It holds everything in place, until you’re ready to remove it. There is no chance of your project slipping out of place while you’re working on it. I don’t know how anyone could be disappointed with the quality of this product.
Angel Crafts is offering you a 25% discount so you can their Transfer Paper Tape for yourself. This code is ONLY available for 48 hours though, so hurry and take advantage while you can! Use


Speak Your Mind