
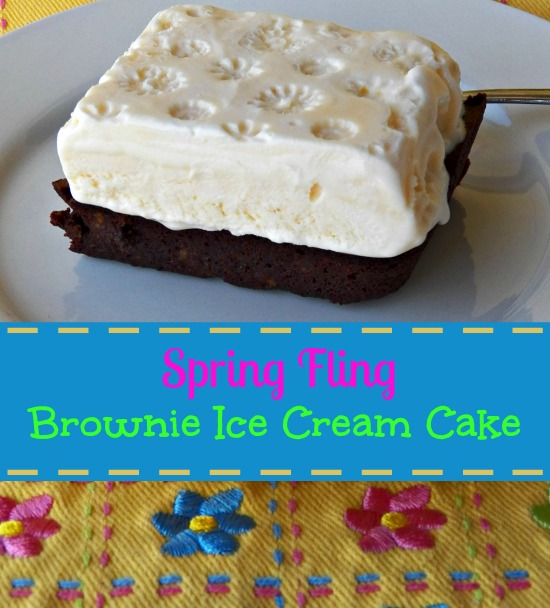
Spring Fling Brownie Ice Cream Cake
Growing up, I was always a fan of the Shoney’s Ice Cream Sundae Cake. All of that ice cream smothered between layers of fudge cake and hot fudge. On top was a small pile of whipped cream and a cherry. Can you picture it and taste it now?
If your part of the country is like mine, there aren’t any Shoney’s open anymore. So, what do you do? Create your own ice cream sundae cake. However, this one is a bit different.

Instead of piling on layers of things that aren’t good for you, the Spring Fling Brownie Ice Cream Cake is a healthy layer of brownie and a cute little layer of ice cream. There are 12 different designs in the Good Cook Spring Silicone Bark and Chocolate Mold that will allow you to create 12 different custom ice cream cakes. They’ll end up so cute that you won’t want to hide them under a second layer of brownie or any whipped cream. You’ll want to take pictures and show them off!

Granted, the Spring Silicone Bark and Chocolate Mold is intended for making things that start out soft and turn solid. It’s ideal for making layered chocolate or white almond bark layered with all kinds of treats. Because I’m trying to avoid things that aggravate my diabetes, I tried to make other treats with my pan. Some were successful, some not so much. I will say that everything tasted good, but wasn’t ideal for this pan. No matter what I made, the Hop Into Spring Silicone Spatula made stirring and spreading a breeze.
If you do have the talent for working with the Spring Silicone Bark and Chocolate Mold, I’d love to see pictures of things you’ve made. Want to order some of the great Good Cook Sweet Creations products to make your Easter and Mother’s Day even more festive? Take 25% off using Code: SpringFling
- About 1 Qt of Ice Cream
- Protein-Packed Avocado Brownies (or Brownies of Your Choice)
- No special prep is needed.
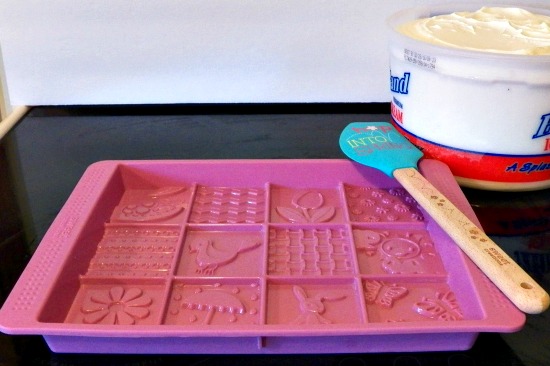
- Allow ice cream to thaw slightly.
- Scoop mushy ice cream out on the Silicone Mold pan.

- Use silicone spatula to spread ice cream evenly across pan.
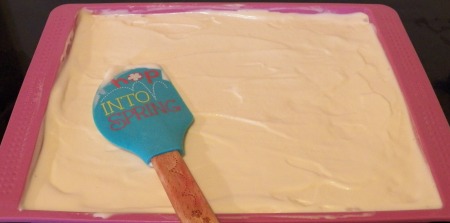
- Use the spatula or a knife to cutting lines on the back of the ice cream before refreezing, if desired.
- Place silicone pan flat in freezer and allow ice cream to refreeze until solid and hard.
- Once ice cream has hardened, run hot water into kitchen sink. Dip silicone bottom of the pan into the hot water.
- Flip ice cream over on a large cutting board. Gently apply pressure to the corners, sides, and bottom of the inverted silicone pan to help loosen the ice cream from the pan.
- Use large, sharp knife to cut ice cream into sections.
- Use knife or spatula to transfer ice cream blocks onto brownies.
- Serve quickly!


Speak Your Mind