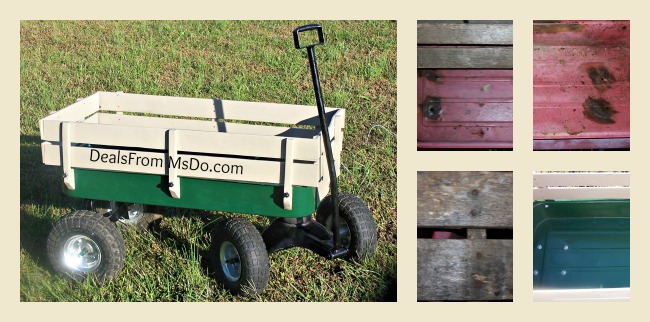
In the old days, they called a DIY wagon project like this one a fix it upper. Personally, I like to think of it as a form of recycling.
One day while I was out thrift shopping, I came across this saddest most beat up little red wagon. It had been used and horribly abused. When it saw me, it begged me to turn it into a DIY wagon. You can tell from the snippets just what kind of rough shape it was in when I purchased it for a whole whopping $5. The pictures actually show what it looked like after I started working on it. I had never done a complete DIY overhaul like this before, but my dad raised me in the wood shop with him, so I was fearless.
 My Little Red DIY Wagon Turned Green With Envy
The first order of business was removing the undercarriage from the actual wagon. Some of the nuts and bolts were easy to separate, but others had to be sawed off with a thin hacksaw blade. This wasn’t a big deal though, just a few pulls on the handle and it was done.


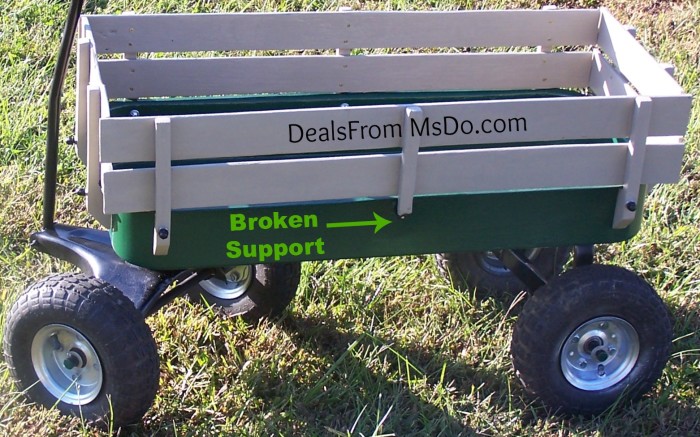
The wood was very old and fragile. Poor little red wagon had probably never been stored in a shed before, but it is now! The wood was so dry that the screws weren’t even holding the boards onto the support brackets in some places, but they flapped back in forth. I ended up taking everything completely apart and sanding the wood down to get the dried and crackled varnish off. It was hard to keep the wood nice and level, but I did the best I could. I figured it didn’t matter considering what an overall improvement I was making. Notice the broken support on the left? When I put it all back together, I moved this support to the center. I used some plastic barrel type things I found in my toolbox to build up the area to give this support something to rest on.

If I hadn’t pointed out the “flaw” would you have ever noticed?
If you take a close look, there are some little black covers over the screws . I’m a self-proclaimed pack rat, so I didn’t have to go and purchase anything when I realized the screws on the outside of the wagon were going to scratch and scrape my legs every time I walked by. These are just things I had hanging around in my toolbox, I think they were some kind of caps from my daughter’s swing set. I never throw away my extra pieces and parts from building projects. I just sort them into a divided organizer tray, which stores away in my toolbox, and have them when I need them.

The original wheel wells were white. I didn’t have any white spray paint, so I used the Cold Galvanizing Spray Compound that I had purchased for the earlier lawn chair project, so no extra expense. If you’re unfamiliar with Cold Galvanizing Spray Compound, you can somewhat consider it a liquid metal spray in a can. It helps prep metal for painting by rebuilding the area that had rusted away. Obviously, it can be used as the paint, too. I did this years ago, and it still looks just fine.

You can see from this picture, that that the Cold Galvanizing Spray Compound also helped rebuild those areas that I had to grind down to remove the rust. Very little evidence can be found of the old damage with the thick coat of oil based paint I used.
This was a truly economical DIY project, too. I used as many pieces and parts from my own toolbox as I could. I did end up spending about $25 on the various nuts, bolts, and screws. The most expensive of which were the brass screws for the woodwork. I figured brass was used originally, so I should use brass again. I also needed to buy the can of black spray paint for the undercarriage. The paint job wasn’t intended to make the wagon look like a John Deere wagon. It was paint that I had leftover from painting my shed and my shed was painted to match my house. 😉 Altogether, I think I spent around $35 on the wagon and the things I needed to purchase.
I won’t say that I did this overnight, because I didn’t. This project was worked on in the middle of summer on my patio. I have sun out there until about 6:30 every evening, so I waited until around that time of day to work on it to avoid some of the heat. Altogether, it did take me about a month or so because of only working around the heat of the day and other things I had going on.
So, the next time you encounter a beat up old wagon, don’t just sigh, DIY!


Oh I love it!! We bought one of those wagons for my nephew, and I know it has seen better days. I may have to look out at garage sales for one of these wagons!
I’ve always loved artsy projects, so I’m now always on the lookout for something to work on. 🙂
lol Love the post title! You did an amazing job, I have to admit I would have kept on walking if I saw that wagon, you did an amazing transformation!
Thank you, thank you, thank you! I am VERY proud of it!
I love it!!! I love finding and turning old things new again and you did an amazing job! It is gorgeous now!
Thanks! I have more to come. 🙂 I picked up a neighbor’s antique vanity yesterday and can’t wait to get started on it.